1. 
2. 
3. 
4. 
5. 
6. 
7. 
8. 
9. 
10. 
|
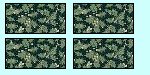
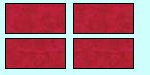
Choose Christmas red, Christmas green,
and gold fabrics that are either tone-on-tone or small print, and a white
tone-on-tone for the background.
Cutting instructions:
1. From the green material, cut four 3 1/2
inch x 6 1/2 inch rectangles.
2. From the red material, cut four 3 1/2 inch
x 6 1/2 inch rectangles.
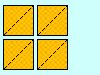
3. From the gold fabric, cut four 3 1/2
inch squares. With a pencil, draw a diagonal line from one corner to
the opposite corner on the back of each square.
4. From the white fabric, cut twelve
3 1/2 inch squares. Same as with the gold squares, draw a diagonal
line on the back of each white square as well.
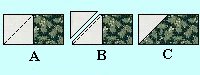
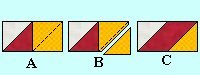
5. Refer to graphic 5. (A) With right
sides together, lay one of the white squares along the left hand side of
the green-colored rectangle. Sew along the pencil line. (B)
Cut through both layers of fabric 1/4 inch to the outside of the sewn
line. (C) Press seam to the light fabric.
6. Repeat the steps from step 5 for the opposite
side of the same rectangle. Then repeat steps 5 & 6 for the remaining
three green rectangles.
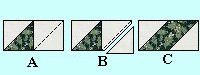
7. Refer to graphic 7. (A) With
right sides together, lay one of the white squares along the left hand side
of the red-colored rectangle. Sew along the pencil line. (B)
Cut through both layers of fabric 1/4 inch to the outside of the sewn
line. (C) Press seam to the light fabric.
8. Repeat the steps from step 7 for the opposite
side of the same rectangle using a gold square. Then repeat steps 7
& 8 for the remaining three red rectangles.
Assembly instructions:
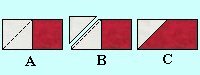
9. With right sides together and using a 1/4 inch
seam allowance, join one of each of the sets together. Refer to
graphic 9. You will end up with four matching squares.
10. Assemble these four squares into a finished
block. Sew the top row together first, then the bottom row. Then
join the two rows into a finished block. Refer to graphics 10 for placement.
Remember to pin the rows together well at the seams to ensure your corners
match up as closely as possible. Do not trim the block(s). Leave
that up to the winner.
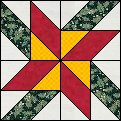
Your completed unfinished block will measure 12 ½ inches.
12 inches after sewn into a quilt!
|